|
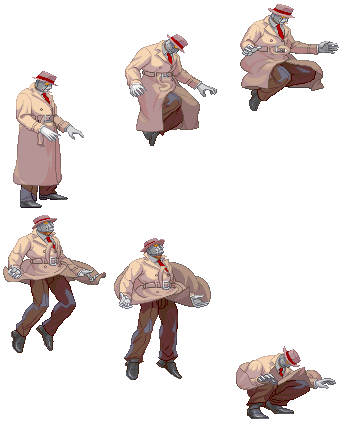
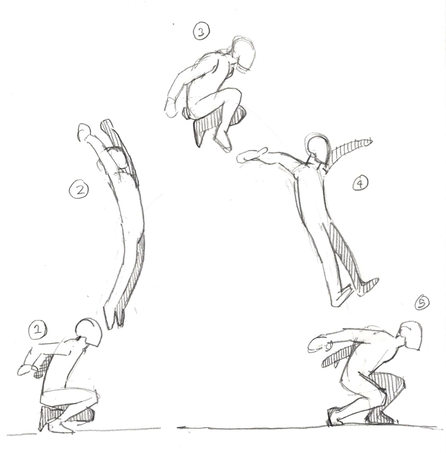
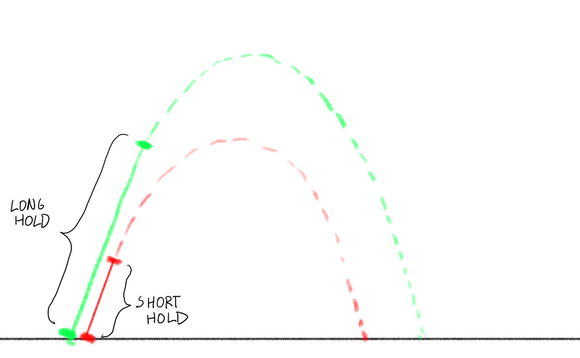
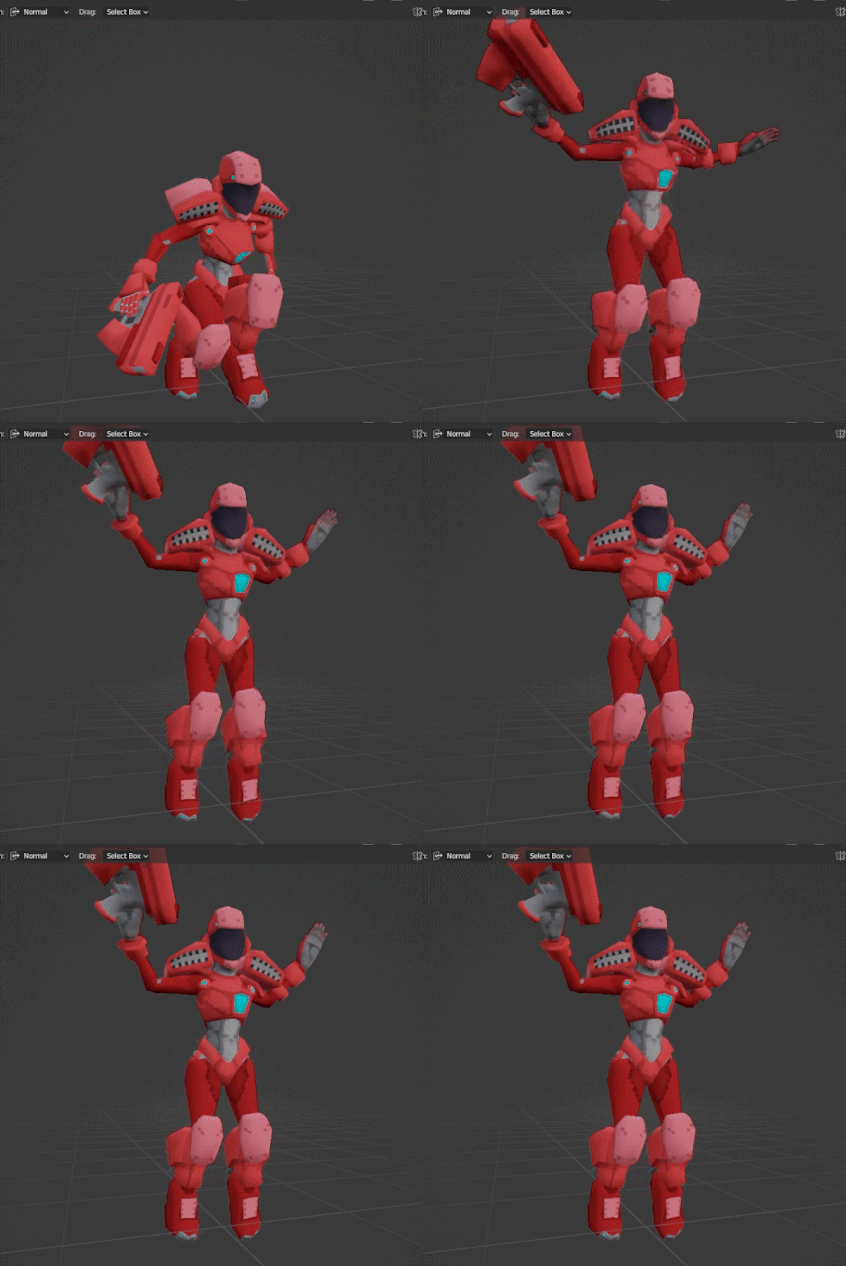
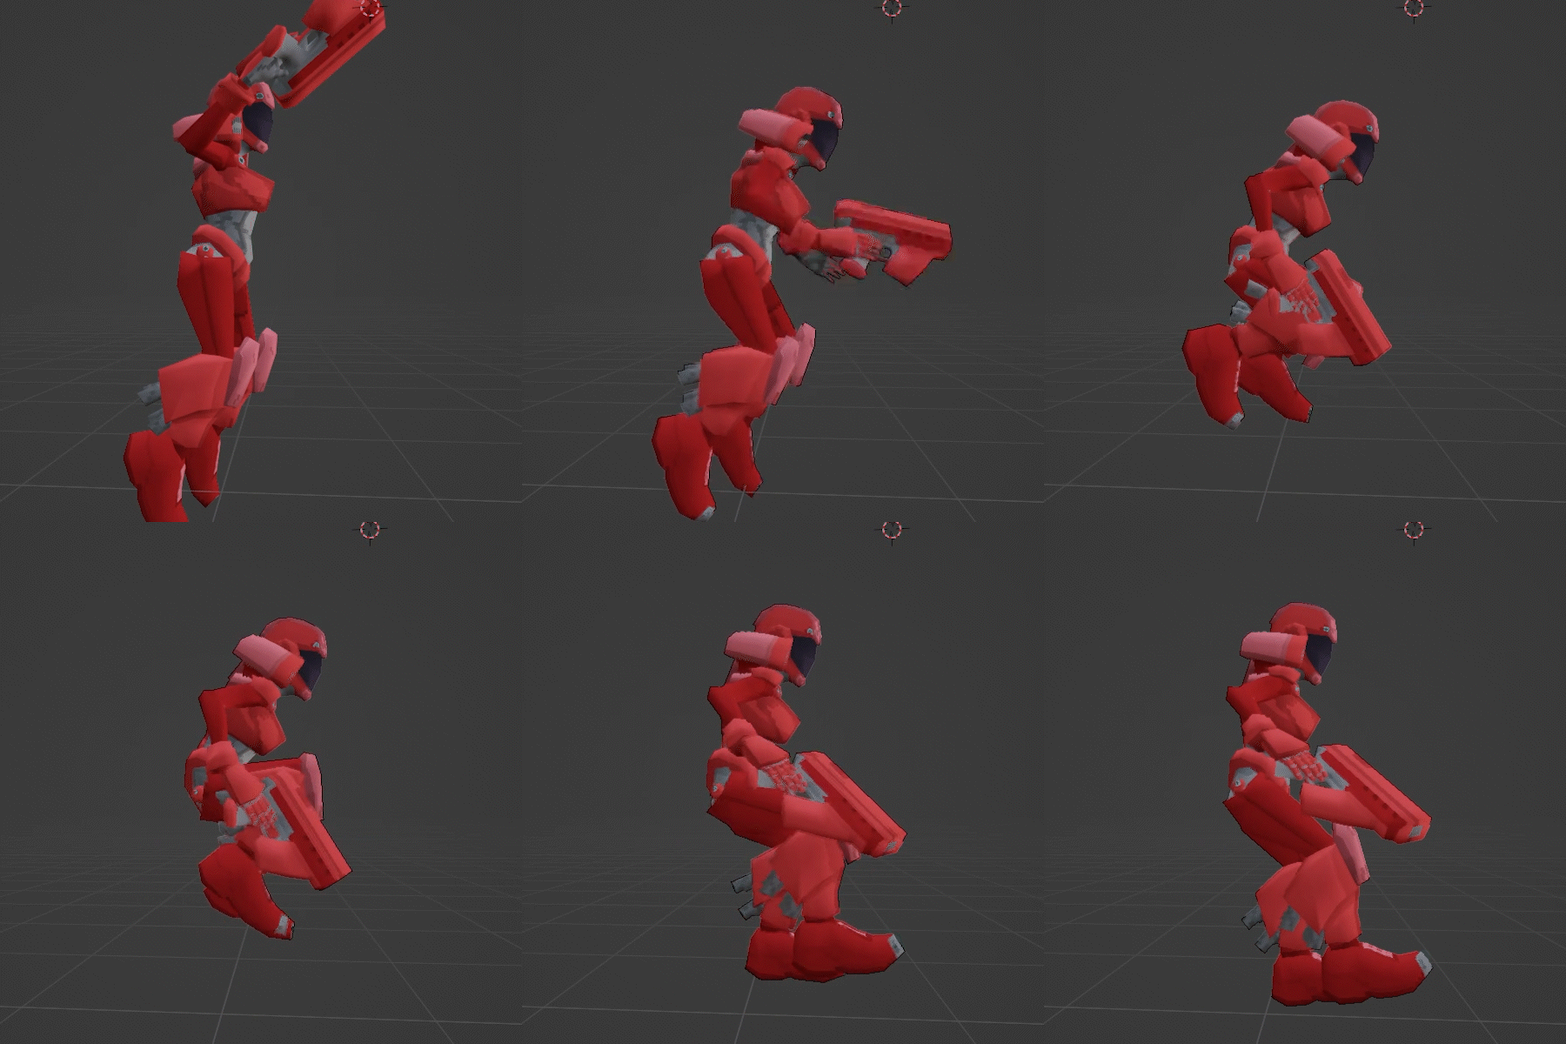
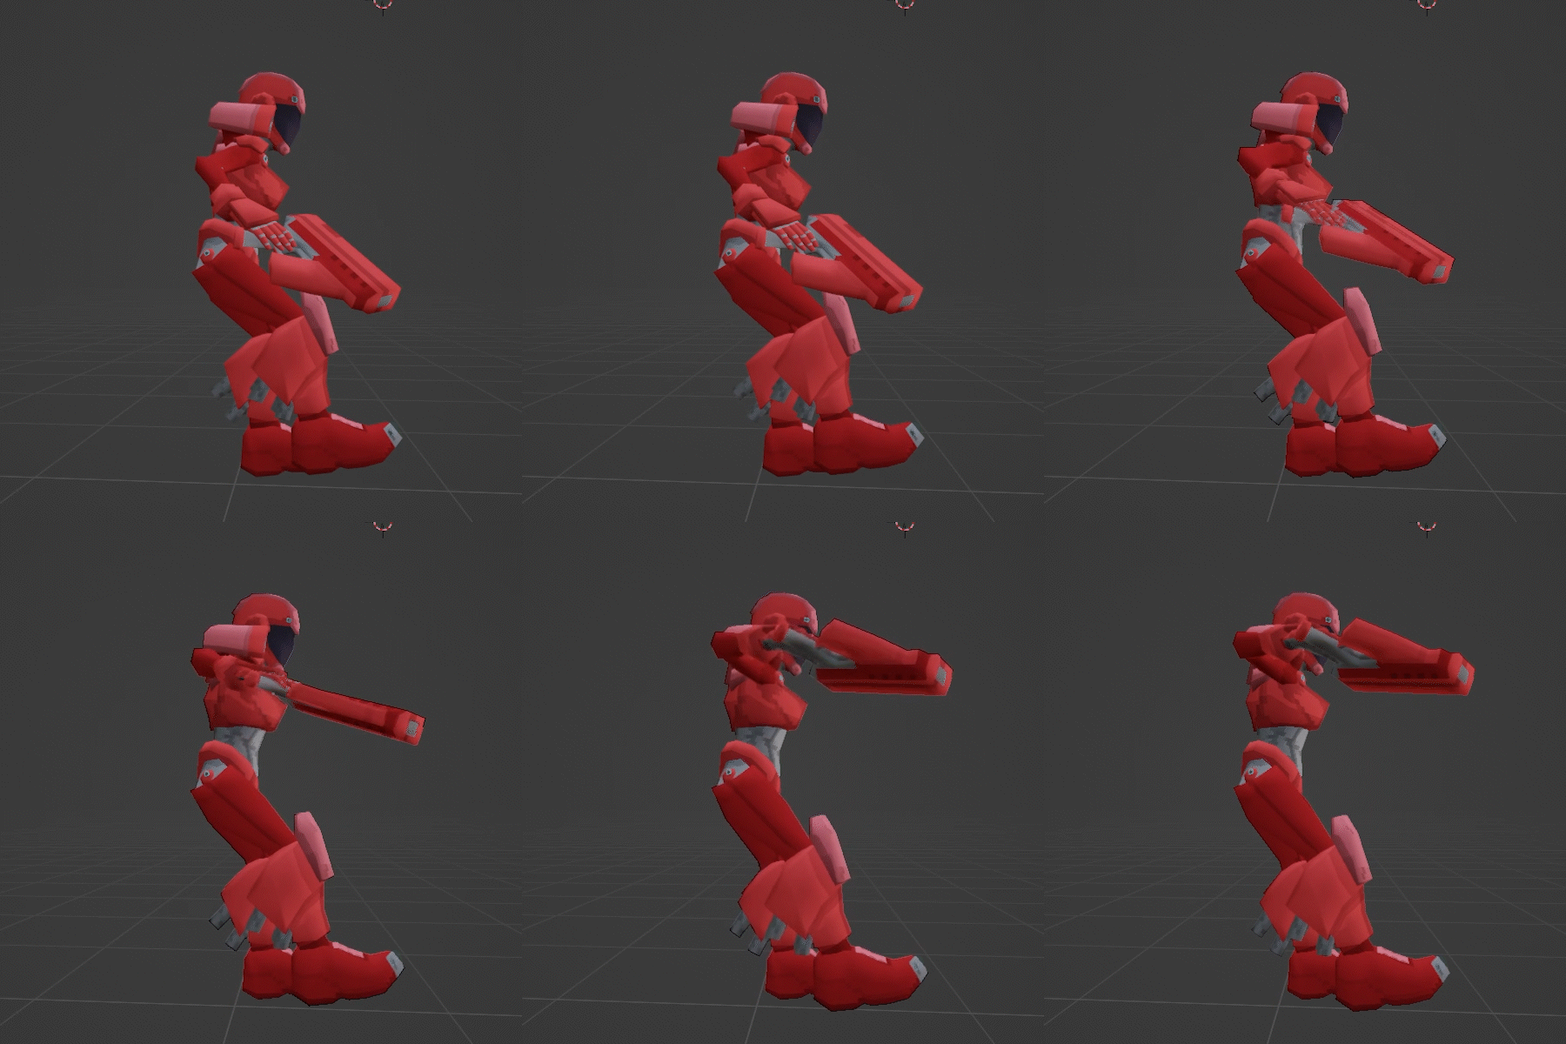
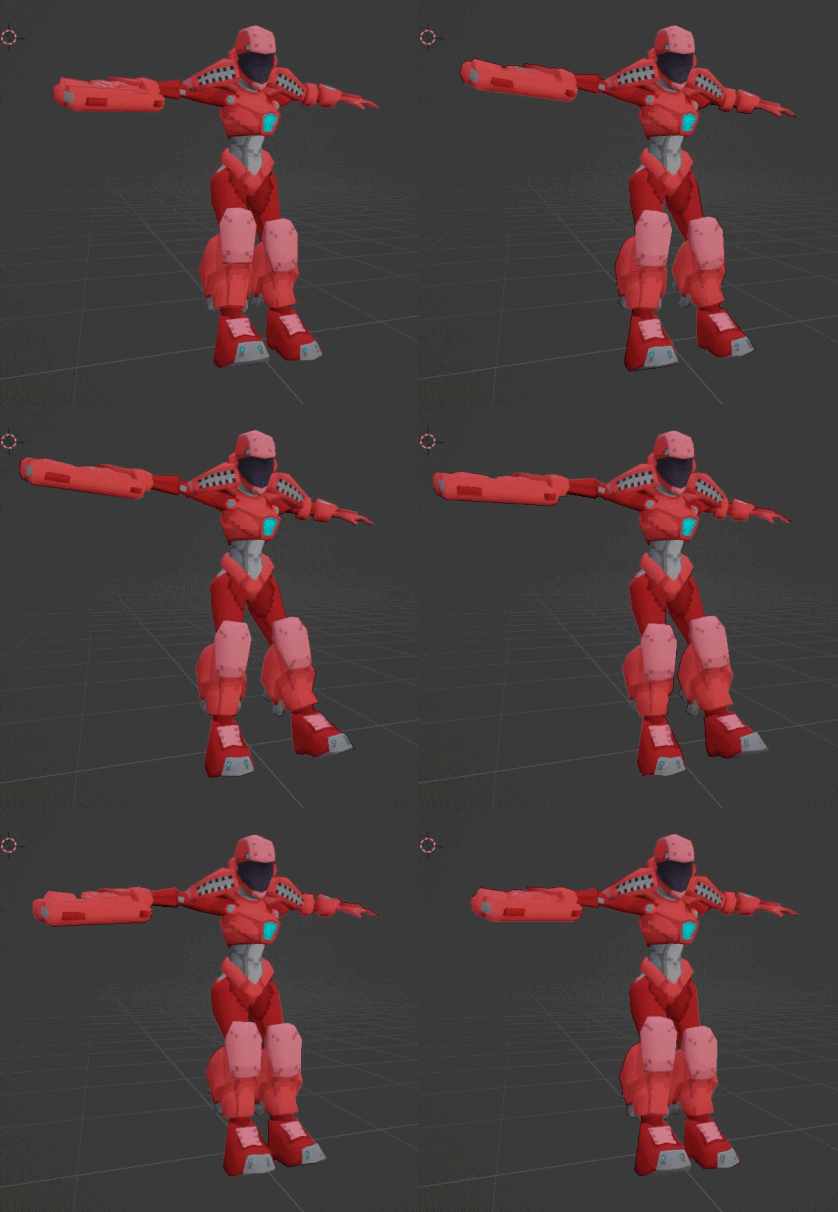
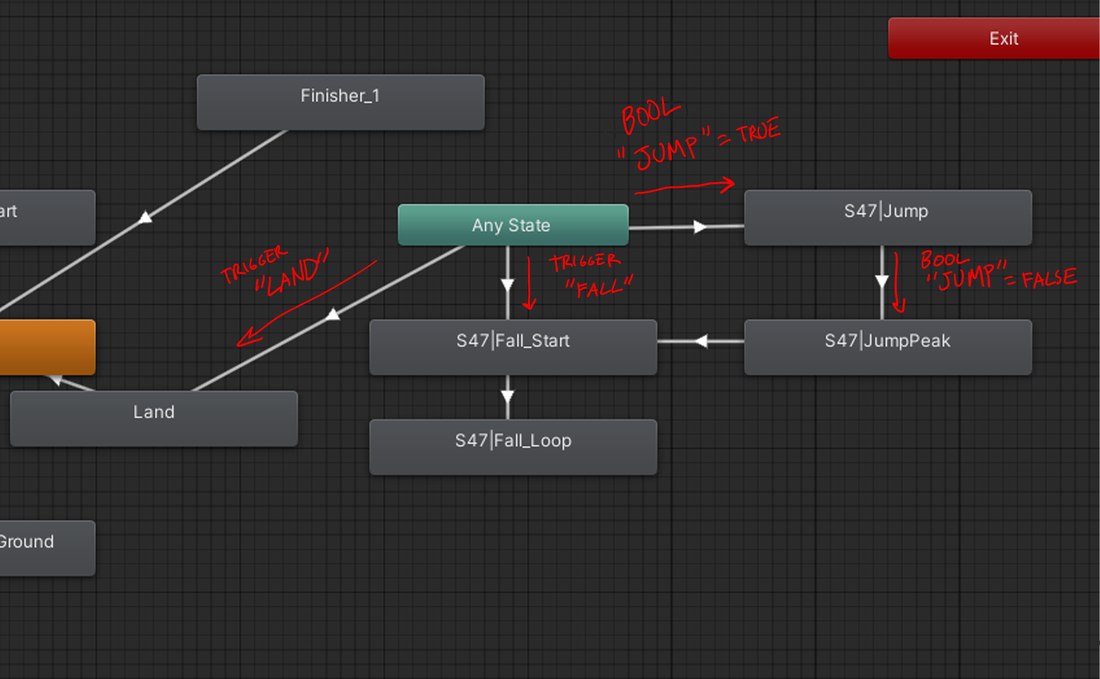
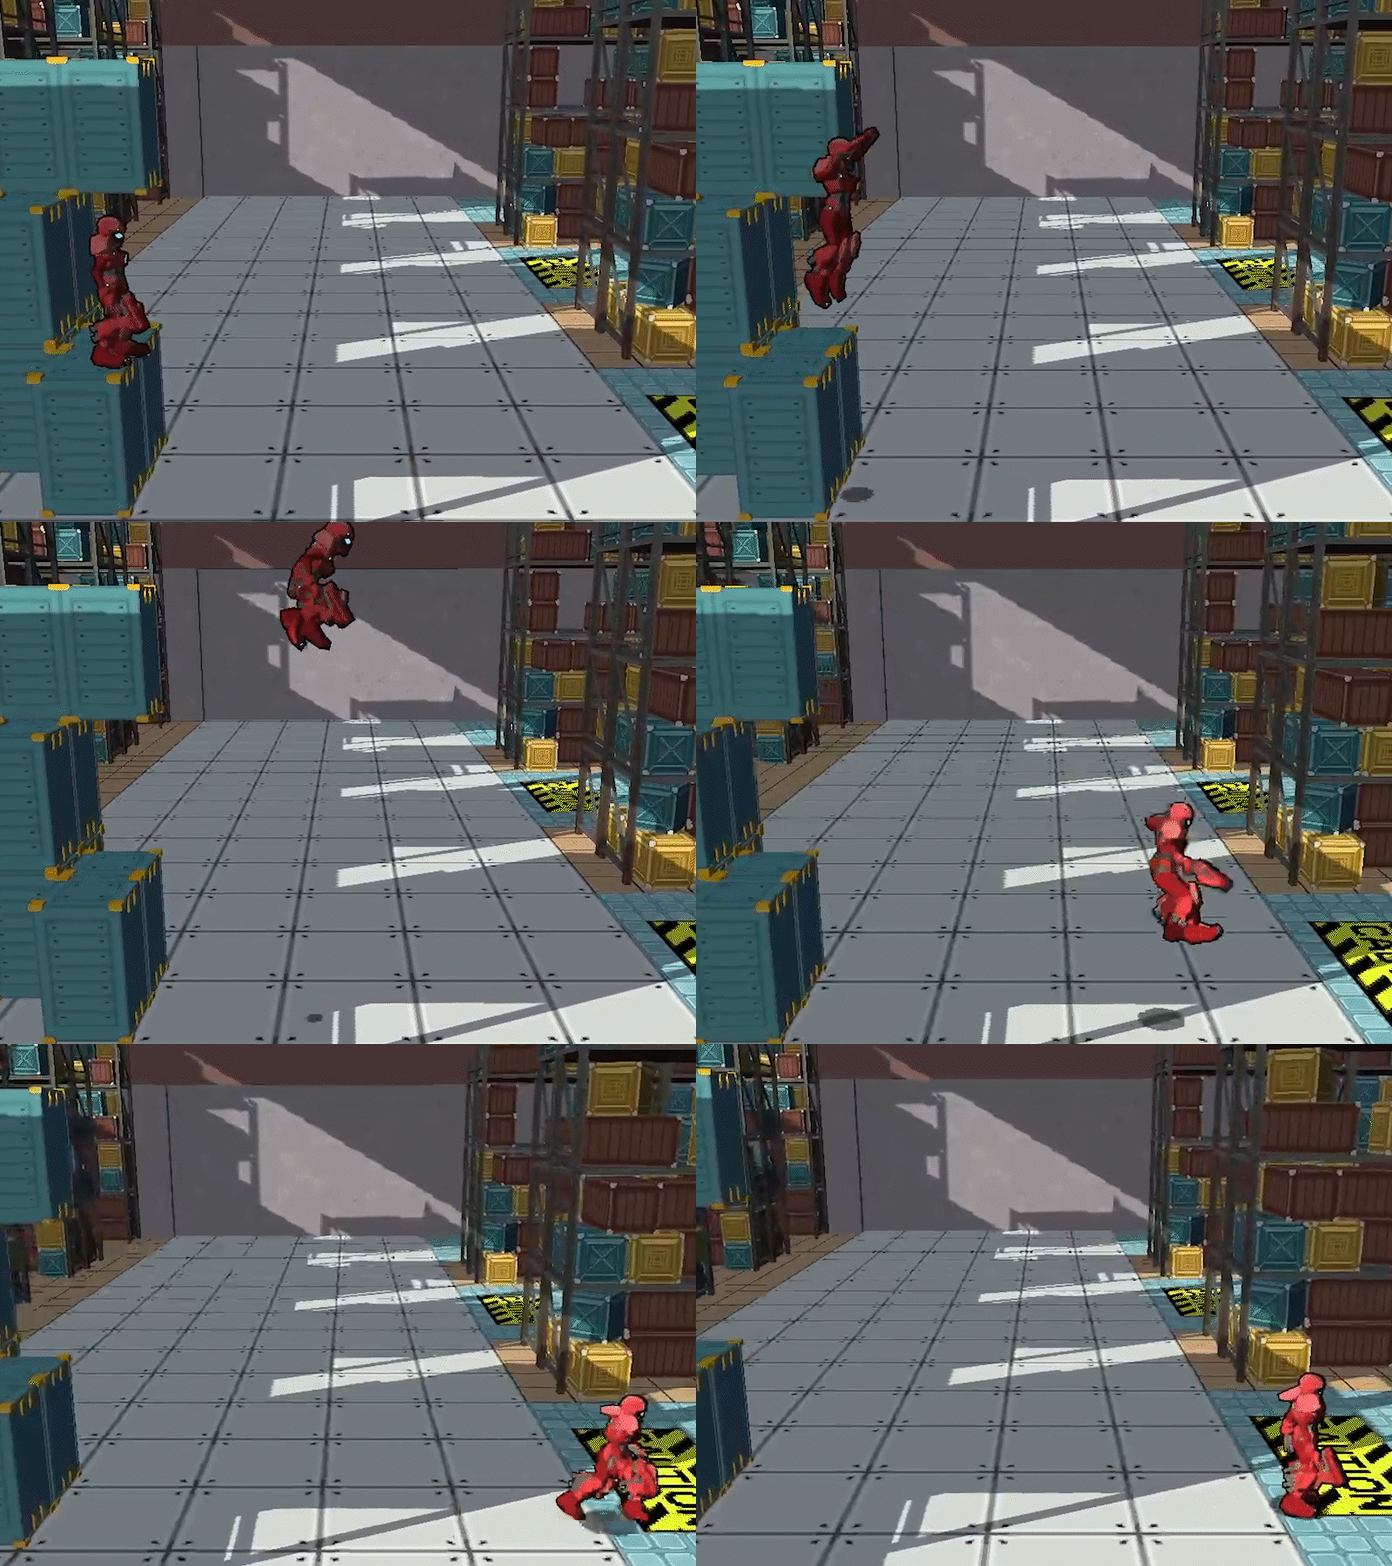
I've been working on a third-person game lately (check out @catbirdsoft on twitter, cohost, bluesky, whatever) and that's meant that I've been solving some problems that I was mostly able to ignore while working on my FPS projects. The most recent of those problems that I've had to deal with is animating a jumping character, and I had to do a bit of trial and error on my own to come up with a satisfactory solution. Here's that solution in blog post form, in the hopes that it'll help some other people who are trying to do the same thing. Jump animations are something that can mostly be ignored in first-person games, because the first-person character is an invisible capsule and players mostly expect it to move like one. In third person games, however, you gotta actually make the character move in a way that feels both responsive and fluid. There are plenty of excellent tutorials for making jump animations online, and if you follow them you might end up with a cool jump animation like this: The problem with this animation, though, is that it only works on flat ground. Fighting games can get away with this because their stages are flat and empty, but most games will feature some terrain variation. Because of this, we have no way of predicting how long the character's jump will last and where they will land. This means we don't need a single jump animation, we need a set of animations that combine to form every possible jump. Now that we know that, we can start breaking down our jump animation into game-ready pieces. There are five key movements in a jump. Let's look at each of these movements and see how they might vary in-game. Movement 1 is an anticipation pose. The character squats, gathers power, and prepares to launch off the ground. Many game jumps eliminate this pose to increase responsiveness - spending frames on anticipation means a noticeable delay between pressing the jump button and leaving the ground, which can make controls feel sluggish and frustrating. Movement 2 is an extension pose. The character has sprung off the ground and is rapidly moving upward. This pose should be held for as long as the character is actively launching themselves into the air. In most games, this will be a constant period of time. In Movement 3, the jump peaks. The character brings their arms down while inertia carries their legs up, then begins to fall back to earth. The length of this peak is determined by your character's initial velocity and their gravity acceleration. In Movement 4, the character has extended again. Their arms trail behind them. This time they will spend in this pose is highly variable - after all, we have no way of knowing how far a character will fall when they start a jump! Movement 5 happens after the character touches the ground. This is a recovery pose, as the force of the impact carries through the character's body. While this may look similar to pose 1, it's much safer to keep! You can move the character during this recovery pose, or cancel it with another action. You might want to vary this depending on the height of the jump, but a fixed animation will work just fine. So, how should we take these movements and convert them into animation clips? First, decide whether or not you want to include anticipation frames before the jump itself. While this will make the jump less responsive, it will make it look better, and a little delay on a jump can be great for action games that don't want players to be able to instantly jump out of the way of attacks (fighting games in particular use this to ensure players don't spend the whole game hopping around the screen). If you choose to include an anticipation period for your jump, I would recommend making it a separate animation clip. This will let you adjust its speed independently of the rest of the jump, and make cutting it easy if you decide it messes with the flow of the game. Alternatively, you can limit the anticipation pose to the very first frame of your jump - this will cause a more dramatic "snap" to your extension pose, making the jump appear more energetic. Next, look at your jump arc. While some characters will have a perfectly parabolic jump arc (an initial velocity set on the first frame of the jump followed by a constant downward acceleration), platformer developers may wish to alter their character's movement in physically inaccurate ways. A common trick you might want to use is a "hold jump" - to enable finer movement control, the player can hold down the jump button to extend the character's launch period, causing them to jump higher. In the above image, we can see the effects of the hold jump on the character's trajectory. While the jump is being held, the character's upward velocity remains constant. After the hold is finished, the character resumes their parabolic trajectory. The period that we are stretching along with the hold is the extension pose. If you have a jump like this in your game, Movement 2 should be its own animation clip, and you should transition out of it once your hold period is complete. For my project, I chose to combine Movements 1 and 2 into a single clip (played above at 25% speed so you can actually see it). It's a very quick transition from a crouched anticipation pose to an extension pose. Once in the extension pose, the clip ends - we're fine with holding on the last frame until it's time to transition to movement 3. Now that we're out of our launch period, we have to handle the peak of our jump. In this case, we'll want a single clip that brings us from Movement 2, past Movement 3, and towards Movement 4. All of these movements happen on a fixed timeline, so we don't need to break them up. You can do some simple math to figure out how long this peak animation should last: if Vi is your initial velocity after launch, T is time in seconds, and G is your gravity acceleration per second, then you should hit your keyframe for Movement 3 when Vi - (T * G) = 0, which is Vi / G seconds. Or, if math is hard and you don't want to do it, just animate the thing and then speed it up or slow it down in-engine as needed. One upside of splitting our jump into clips like this is we can just dial individual parts of our jump in after animating them! Despite saying we could do this section in one clip, I included a split here for one reason: I want to be able to smoothly transition into Movement 4 when the player walks off the ledge. Movement 4 is a generic "falling" animation, so I can reuse it for non-jump aerial movement. Shown here are two clips: one "jump peak" animation, and one "fall start" animation. When we jump, we transition automatically from the jump peak to the fall start as if they were one clip, but when we start any other aerial movement we transition straight to the "fall start" animation. (If this is confusing you, don't worry - I'll also include a screengrab of the animation graph at the end of this post). As you can see, the "fall start" animation looks pretty bad by itself - it's a single transition that only works as part of a bigger animation. Once we've finished the fall start animation, we're all the way into Movement 4, but we still don't know if we've touched the ground! In fact, if we're falling a long distance, we might have to hold our Movement 4 pose for several seconds or more. That's why we're adding yet another clip to our jump - a looping fall pose with a little secondary movement. This also doesn't have to look great, unless you're planning on making long falls a common part of your game. We hold this clip until we make contact with the ground, at which point we play a little landing animation (Movement 5, our recovery clip). Once again, this is a pretty quick and simple animation - I even sped it up after putting it in engine. We just want to show the character in their impact pose briefly, then bring them back to a standing pose so they can run around on the ground like normal. You'll also notice that we start in the impact pose rather than transitioning from the fall pose. The fall to land transition happens in the blend between the fall clip and the land clip. Because we want the impact to be sharp, the transition only lasts for a frame or two. Here's what the jump animations look like laid out inside a Unity animator. We have one boolean and two triggers that govern our jump - "Jump," a bool which starts the jump process, "Fall," a trigger which starts the fall process, and "Land," a trigger which terminates the jump. Setting "Jump" to true moves us to movement 1, where we then hang until it is set back to false. Afterwards, the animation automatically progresses along the movements we described until it gets to the Fall Loop clip. It can be interrupted at any time by landing, because (as mentioned above) we have no idea when we're going to hit the ground. If the player falls instead of jumping, the "Fall" trigger smoothly transitions us to Movement 4. Now that the animations are in-engine, let's see how they look when they're put together: Boom! The animations flow together smoothly. It's unlikely that players will notice all the effort spent on this jump once the game ships, but they'll be jumping often enough that I feel it is worth the time investment (although I haven't even got to the VFX... that's an ordeal for another blog post).
I hope this was helpful! If you found something in this post unclear or confusing, please let me know in the comments or via email or whatever and I'll do my best to clear it up. If you have questions about the code used to trigger these animations, feel free to ask about that, but it's basically separate from the animation work itself so I've chosen not to discuss it in the post itself.
0 Comments
|
ArchivesCategories |

 RSS Feed